
27 Stunning Minimalist Bee Tattoo Ideas to Inspire You
Minimalist bee tattoos are a growing trend for their clean lines, subtle symbolism, and easy integration into daily life. These designs capture the essence of bees—symbols of hard work and nature—while keeping things simple and elegant. Whether you’re new to tattoos or want something discreet, this list explores 27 inspiring ideas that blend creativity with practicality. You’ll find options for various spots on your body, plus tips on making them affordable and personal. Let’s dive into these stunning ideas to spark your imagination and help you find the perfect design.
Simple Line Work Bee
Picture a basic bee outline with just a few strokes. This design uses fine lines to show the bee’s shape. It’s perfect for beginners. You get that elegant look without much detail. Think about placing it on your wrist for easy viewing. Budget tip: Look for local tattoo shops with flash deals under $50. For a DIY feel, sketch the design on paper first with a fine-tip pen. Practice makes it real. Keep aftercare simple with unscented lotion. Bold lines stay crisp longer. This idea works for anyone wanting subtle meaning. Add a personal twist, like a small dot for a favorite spot. It’s quick and painless. Go for it if you love nature vibes.
Geometric Bee Fusion
Mix a bee with triangles or circles for a modern edge. The bee’s body becomes part of the shapes. It’s abstract and cool. Place it behind your ear for a hidden gem. This style adds flair without overwhelming. Save money by choosing a smaller size, often $30 to $60 at walk-in studios. DIY example: Use a stencil kit from a craft store to trace on your arm temporarily. Test it out. Simple soap and water keeps it fresh. Focus on the bee’s hard work theme. Make it unique with your birth year inside a shape. It’s versatile for any skin tone. Try this for a fresh take on tradition.
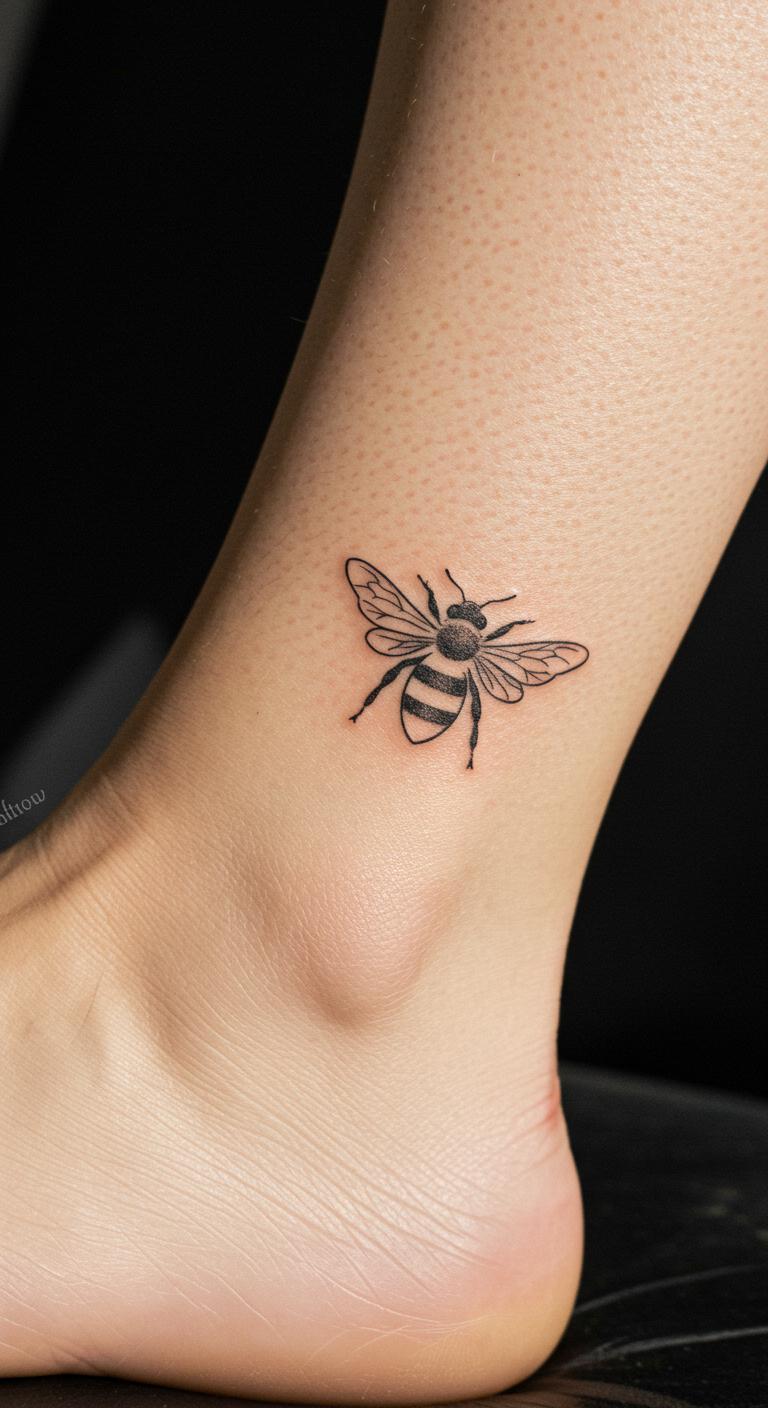
Bee with Floral Accents
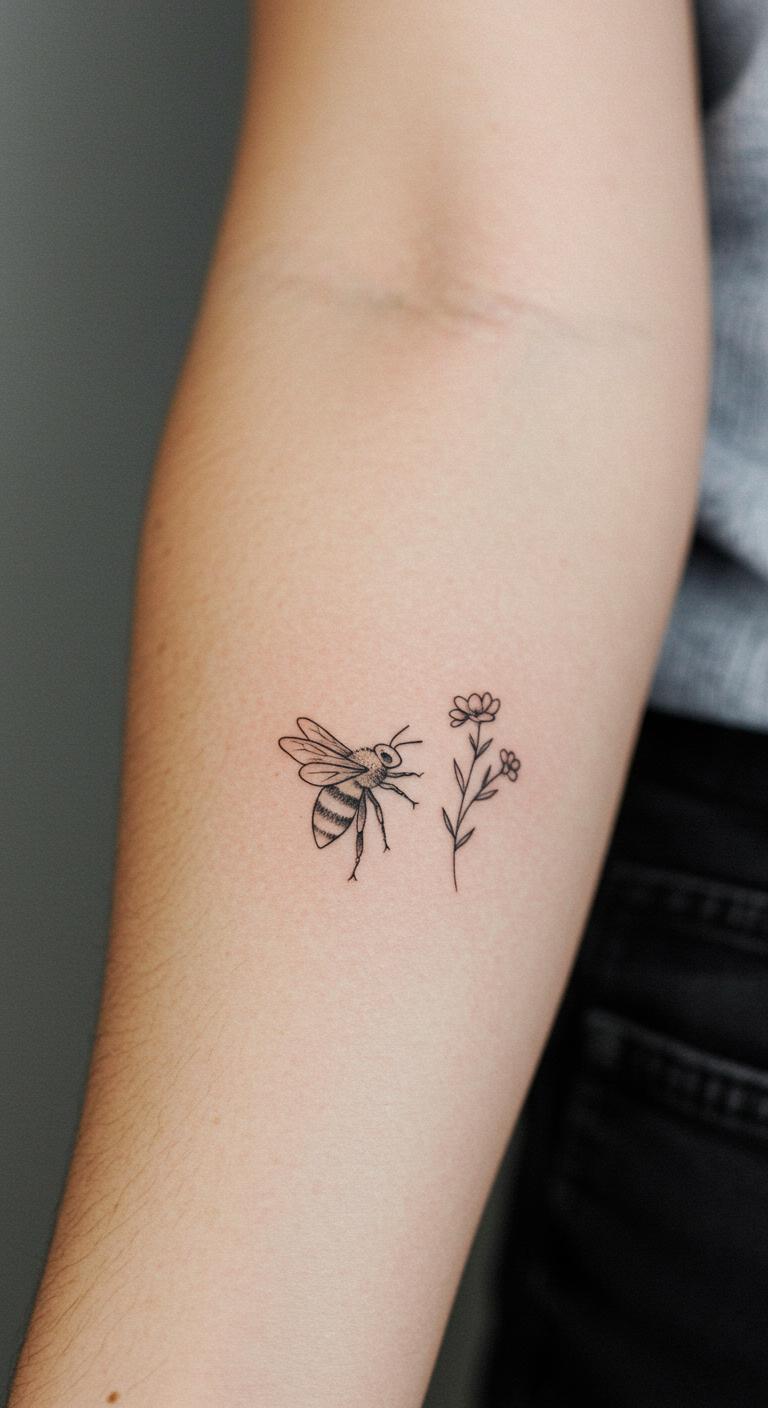
Pair the bee with a tiny flower or leaf. It highlights pollination and nature. The lines stay light and airy. Put it on your ankle for a sweet spot. This design feels organic and inspiring. Go budget-friendly with artists offering packages around $40. DIY tip: Draw it on with henna from your local shop for a temporary version. Lasts a week or more. Use gentle creams for maintenance. Emphasize teamwork in your choice. Add a personal element, like a initial near the flower. It’s meaningful and pretty. Perfect for nature lovers.
Negative Space Wings
Let the skin show through for the wings. It creates a clever illusion. The bee looks ethereal and smart. Try it on your finger for daily reminders. This idea plays with light and space. Find deals online for under $50. DIY approach: Use washable markers to mock it up at home. Easy to erase. Pat dry after washing to preserve lines. Symbolize dedication with this style. Customize by adjusting the wing size. It’s subtle yet powerful.
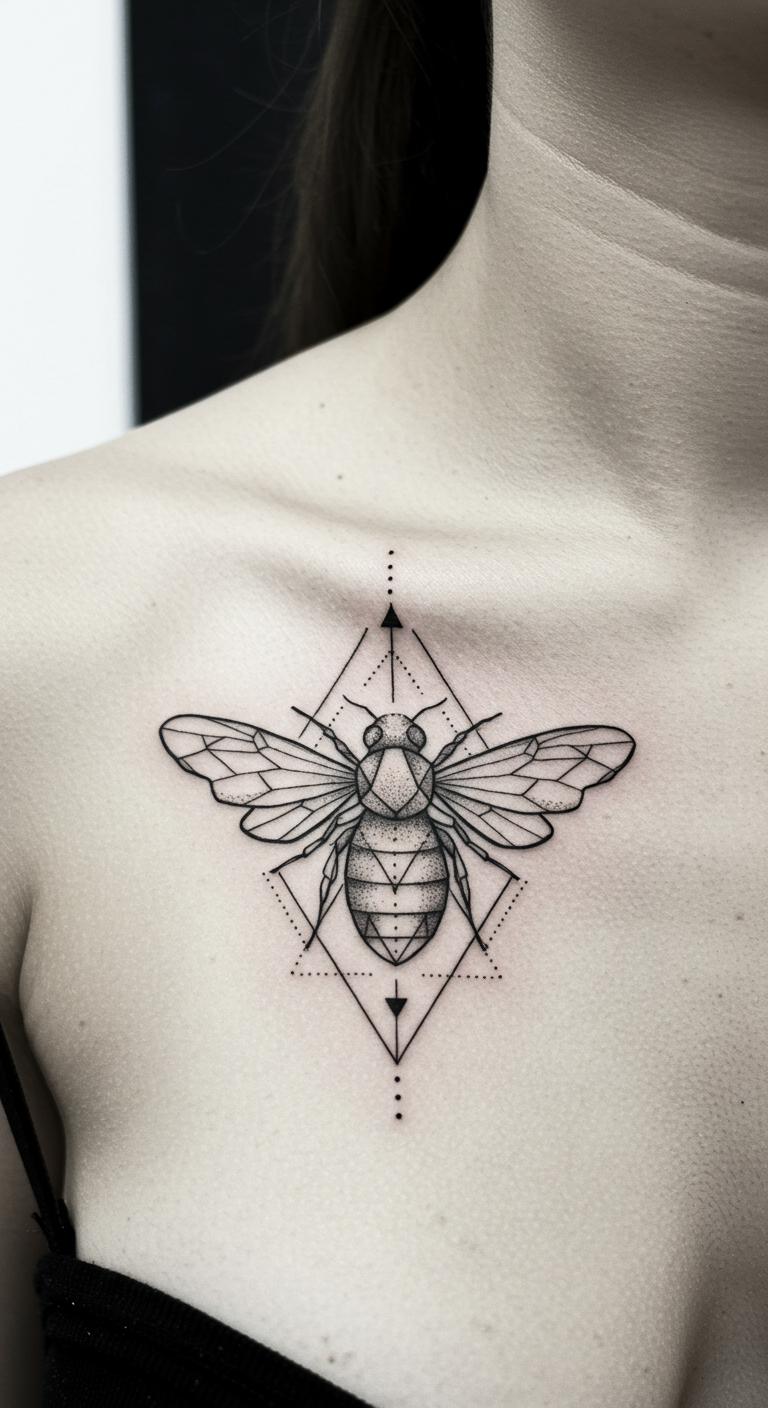
Colored Accent Bee

Add a touch of yellow to the stripes. It brings vibrancy while staying minimal. The rest is black for balance. Place it on your collarbone for elegance. This adds a pop without fuss. Opt for affordable sessions at $45 or less. DIY: Mix food coloring with lotion for a safe, temporary tattoo at home. Wipe off gently. Keep colors bright with sun protection. Represent nature’s beauty here. Make it yours with a custom color shade.
Abstract Bee Shape
Turn the bee into flowing curves and dots. It’s artistic and abstract. Ideal for the nape for a secret touch. This design sparks creativity. Score budget options for around $35. DIY idea: Trace with a phone app and print a stencil. Fun and free. Moisturize daily to maintain. Stand for productivity with this. Add abstract elements like swirls.
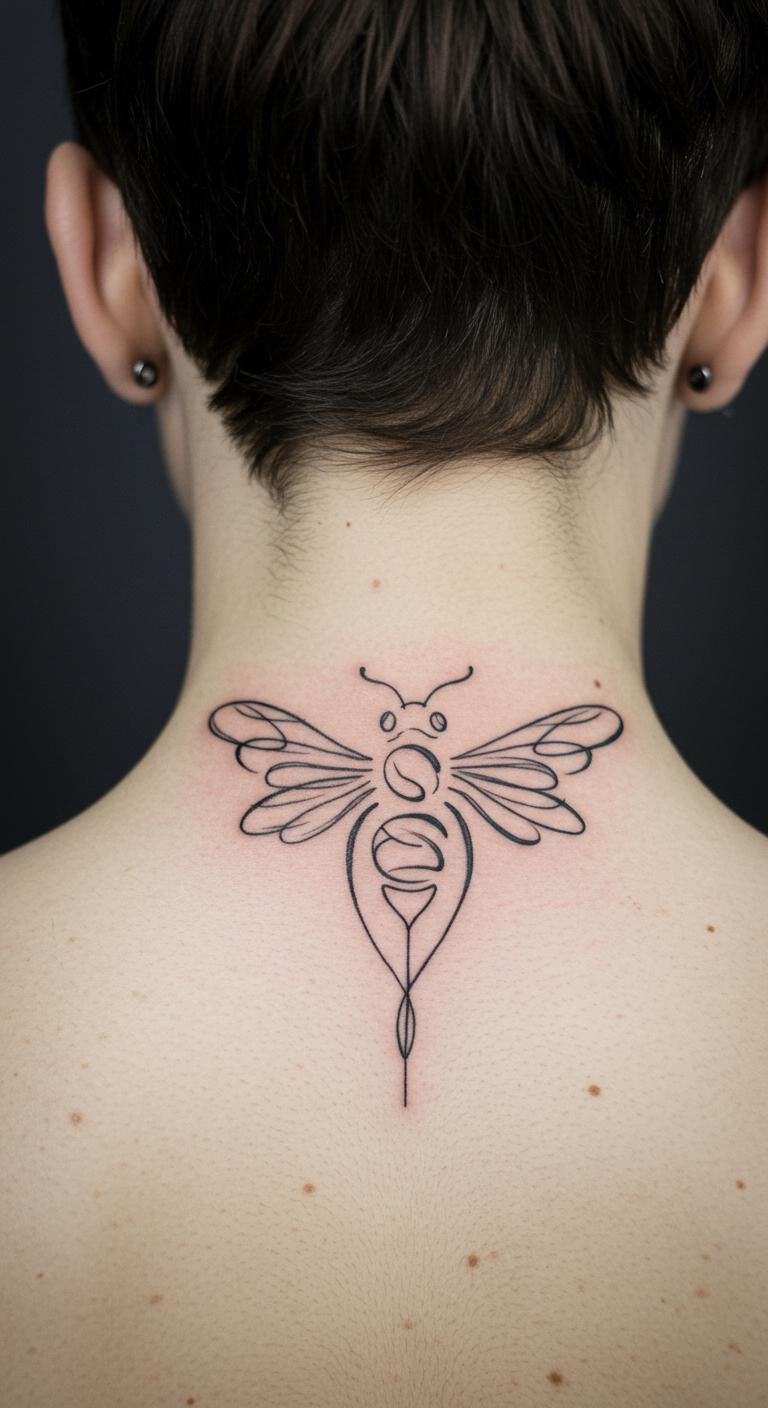
Spine Aligned Bee

Follow your spine’s curve with the bee. It flows with your body. Great for a bold yet minimal look. Position it along the spine for impact. Keep costs low at $50 tops. DIY: Use body paint to preview on a mirror. Simple setup. Protect with clothing from rubs. Embody loyalty through this. Tailor the length to fit.
Bee and Honeycomb
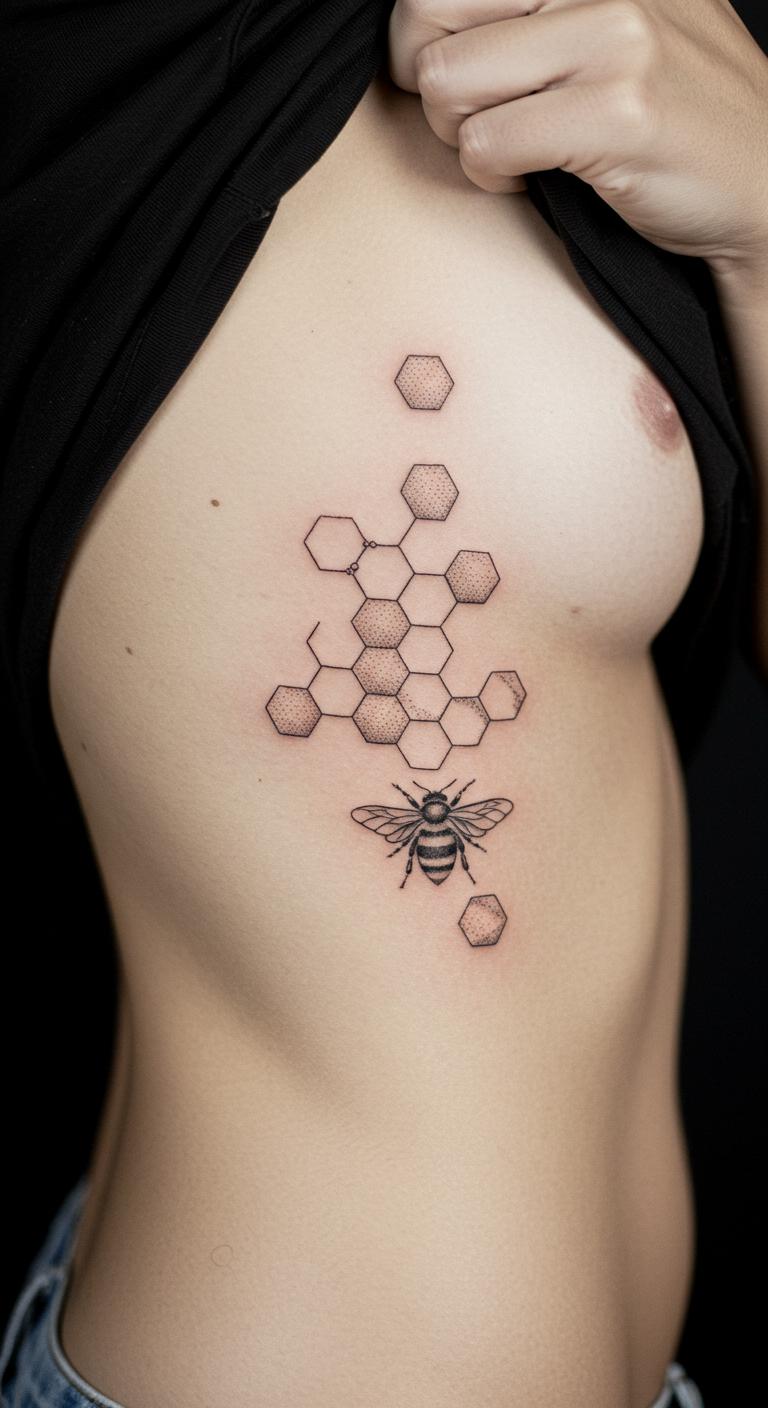
Incorporate small hexagons around the bee. It nods to the hive life. Place on your rib for a personal hideaway. This adds depth affordably. Sessions might cost $40. DIY: Cut shapes from tape for a temporary design. Quick and cheap. Clean with mild soap. Highlight community aspects. Personalize with honeycomb size.
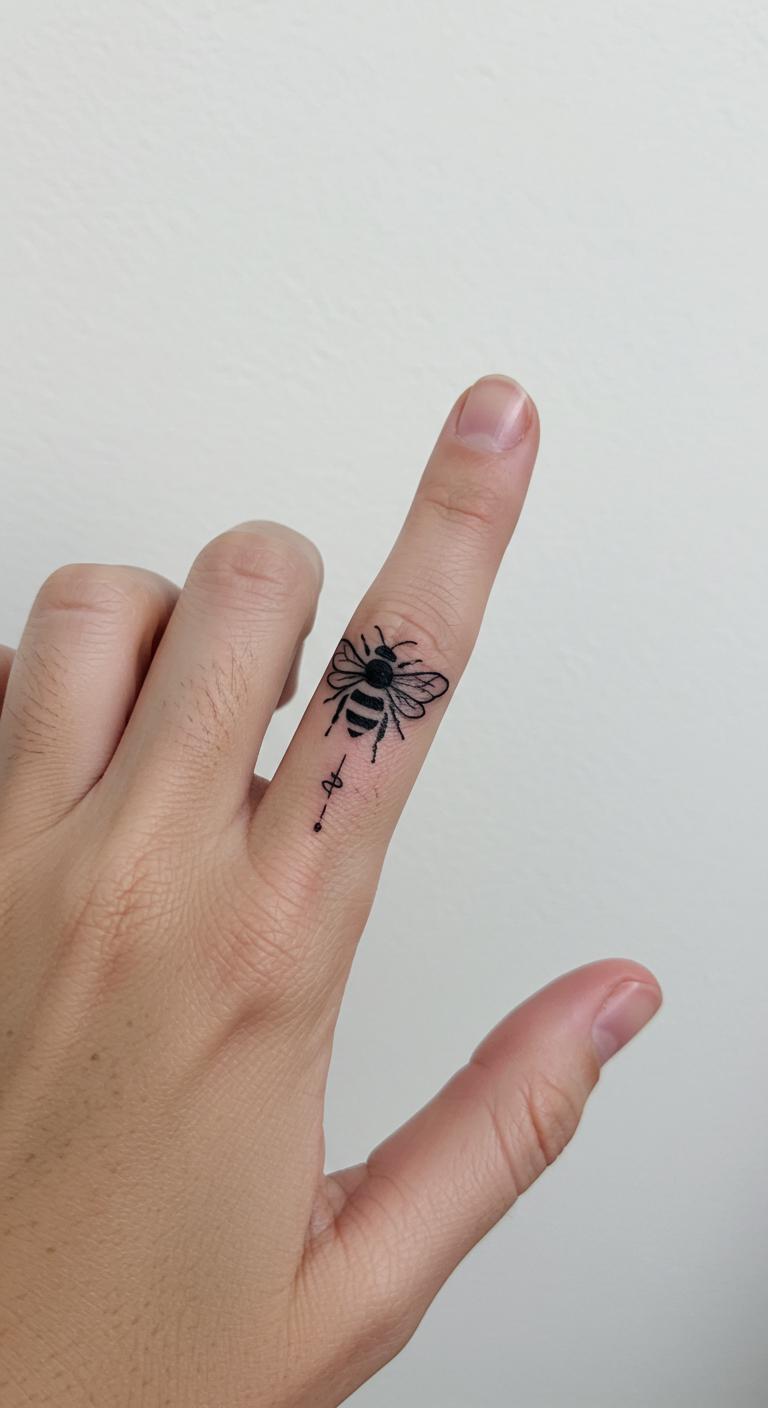
Tiny Finger Bee
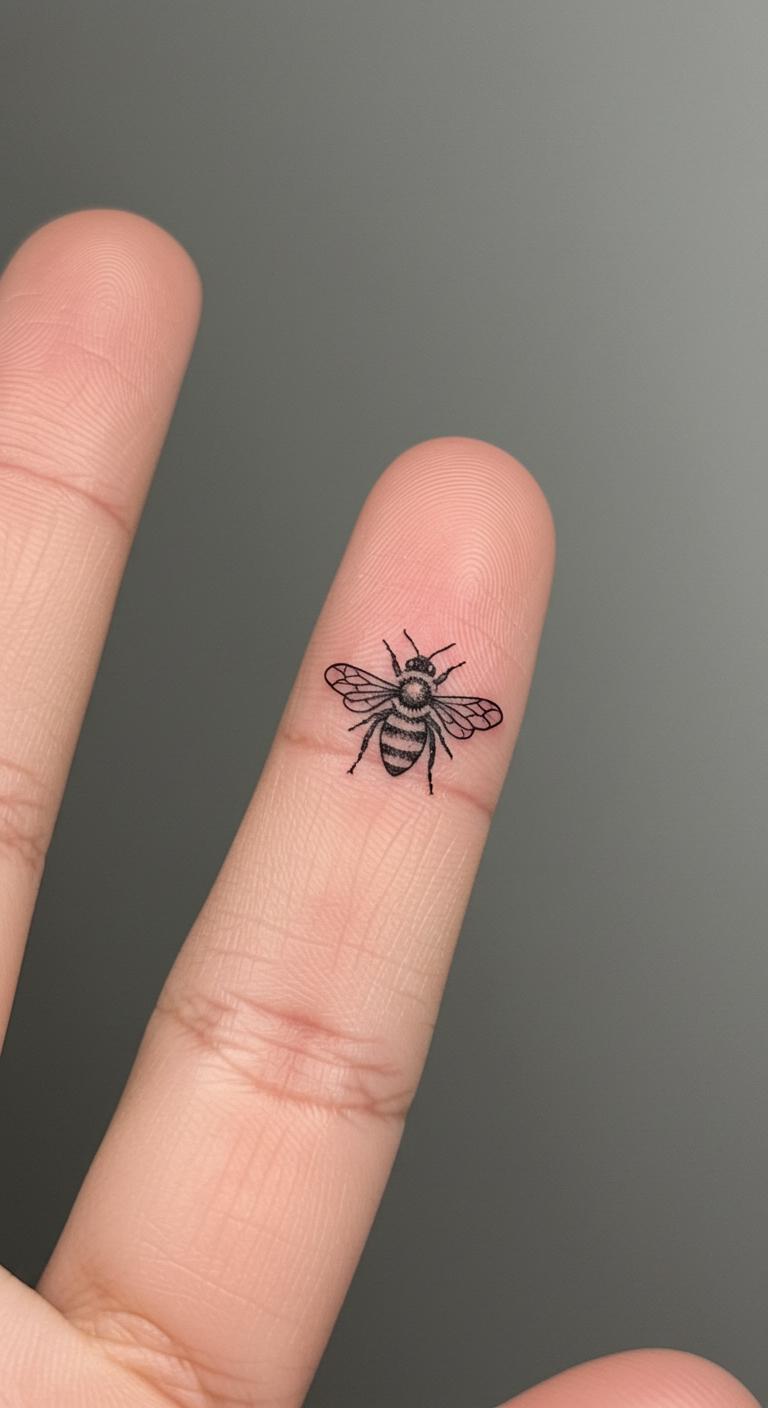
Go super small on your finger. Just a few lines for the bee. It’s discreet and cute. Perfect for everyday wear. Find artists charging $25. DIY: Draw with an eye liner pencil first. Easy test. Avoid water initially. Symbolize hard work small. Adjust for finger width.
Bee with Initials
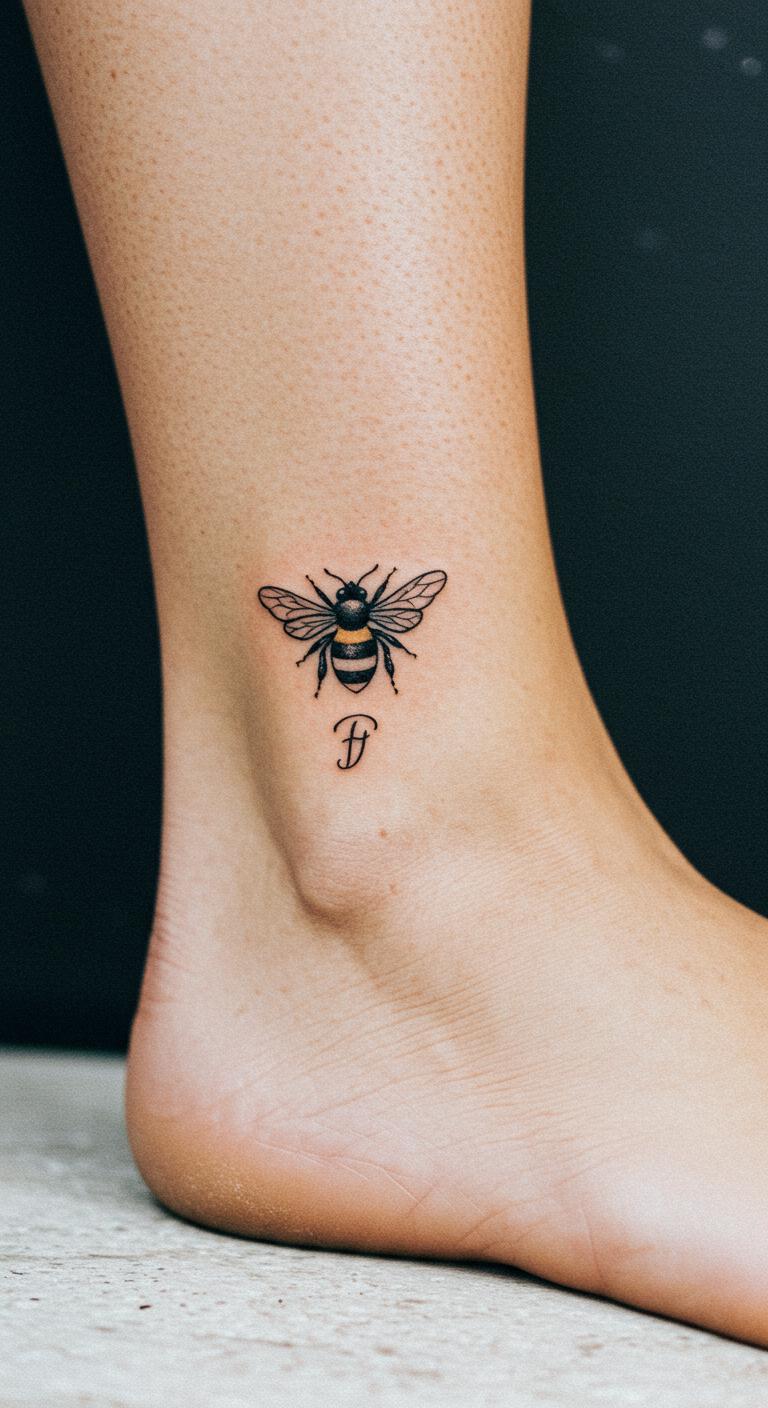
Weave in your initials beside the bee. It makes it uniquely yours. Try the ankle for visibility. This adds a story. Budget at $35 or so. DIY: Write with a fine pen on paper. Practice runs. Use barrier cream post-tattoo. Focus on dedication. Choose font styles.
Wrist Wrap Bee
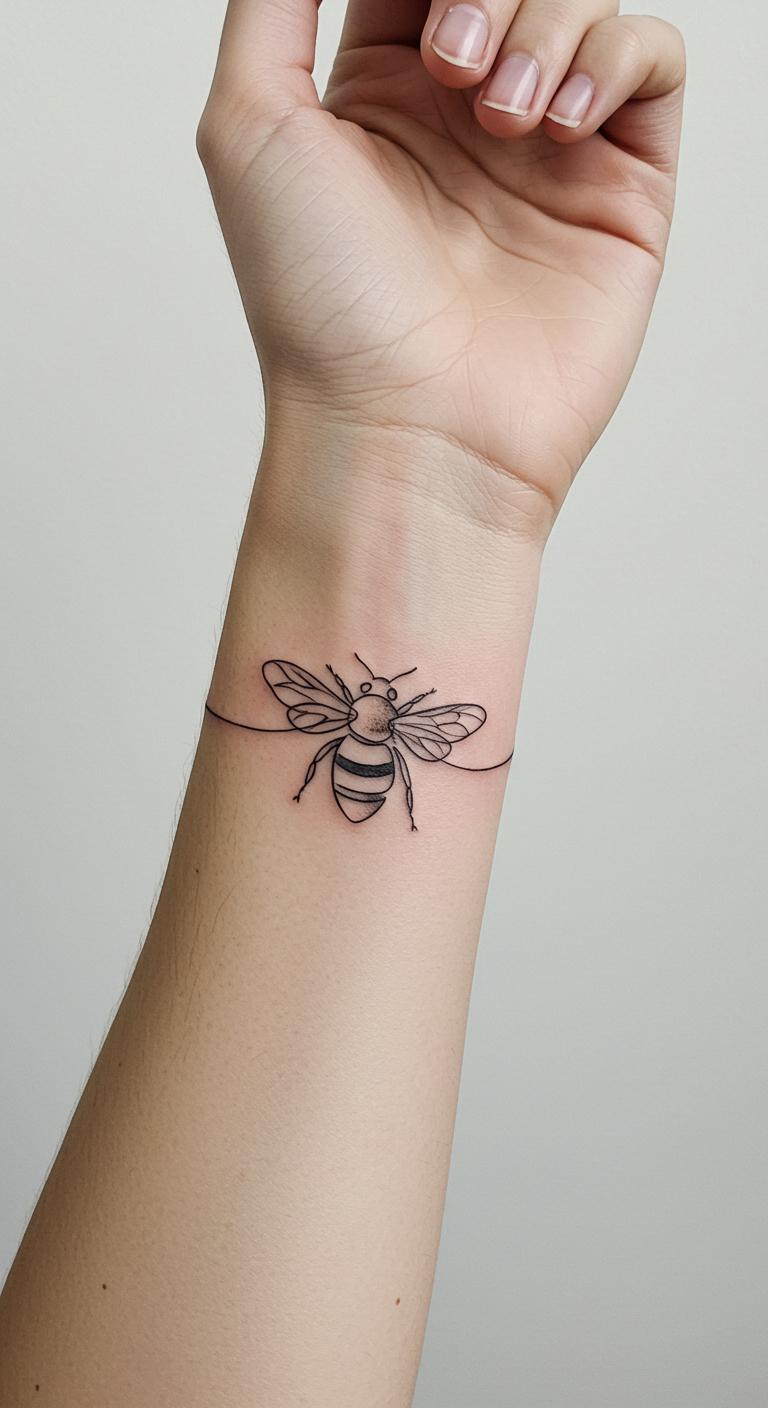
Let the bee curve around your wrist. It forms a band effect. Stylish and wrapping. Place on wrist for constant view. Deals under $45. DIY: Wrap string around to plan. Handy trick. Keep moisturized. Represent nature’s cycle. Customize the wrap.
Ear Lobe Bee
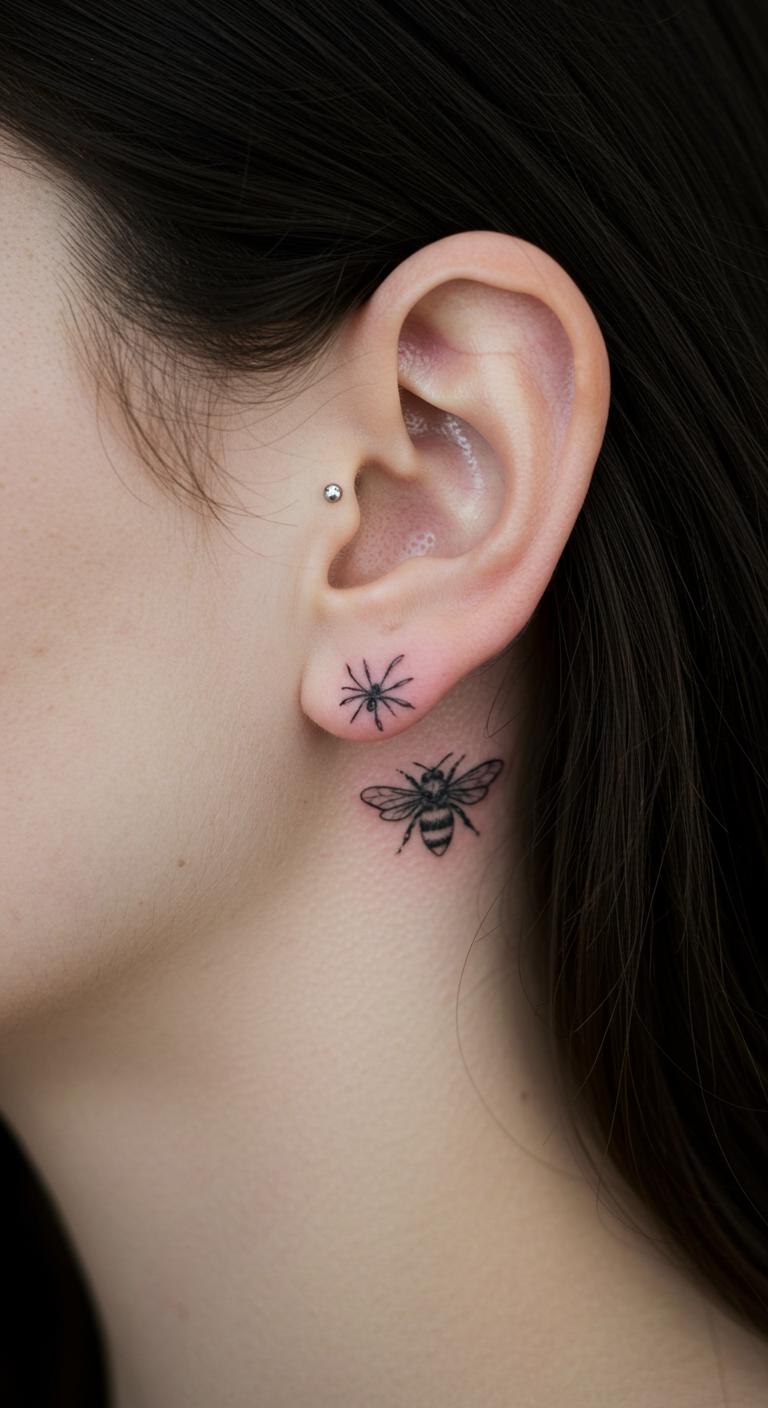
Hide it behind your ear for surprise. Simple lines make it pop. Great for first tattoos. Position near ear for discretion. Cost around $30. DIY: Use ear stickers as testers. Fun idea. Pat dry after showers. Embody perseverance. Size it to fit.
Ankle Chain Bee
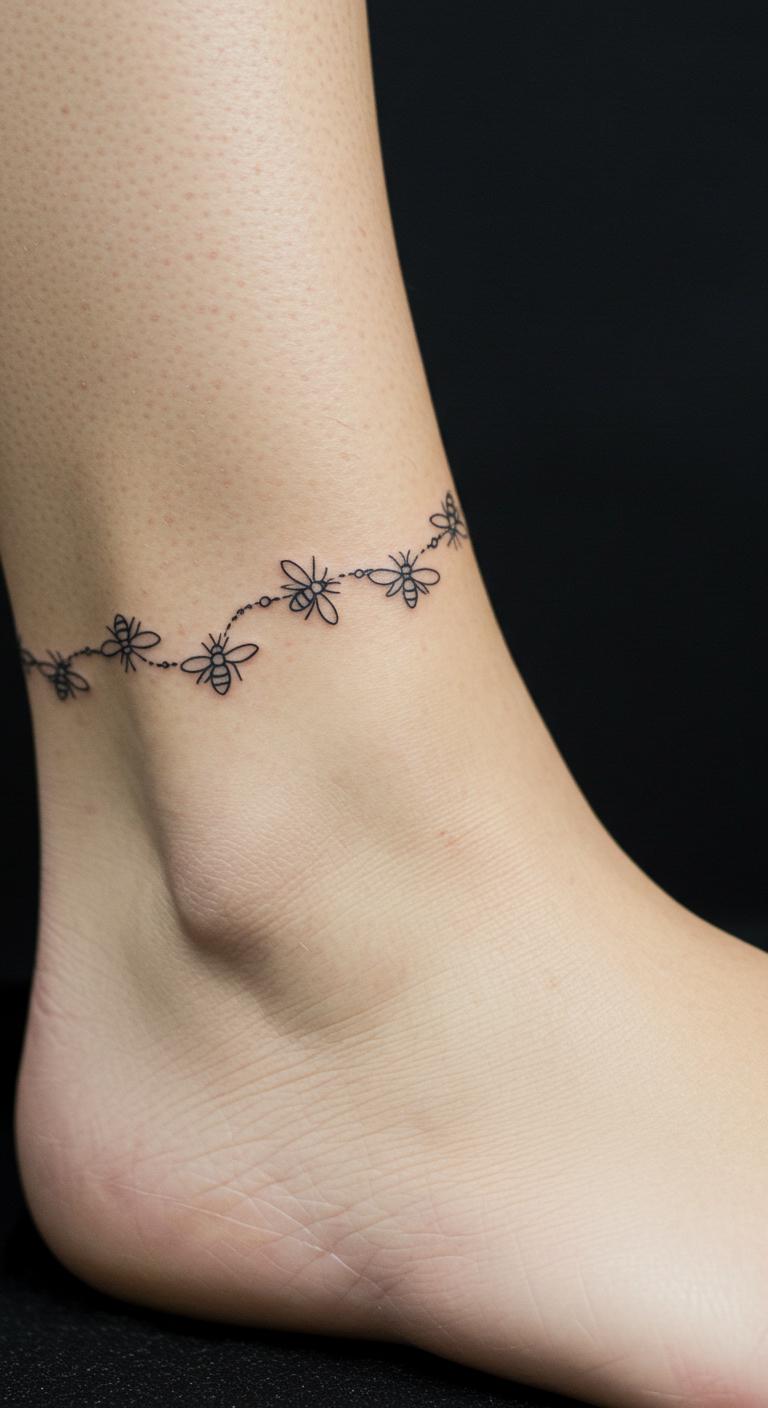
Link multiple bees like a chain. It creates a dainty effect. Put on ankle for flair. This is playful yet minimal. Sessions for $40. DIY: Chain beads on string to mock. Creative. Protect from friction. Symbolize teamwork. Vary the links.
Collarbone Flight Bee
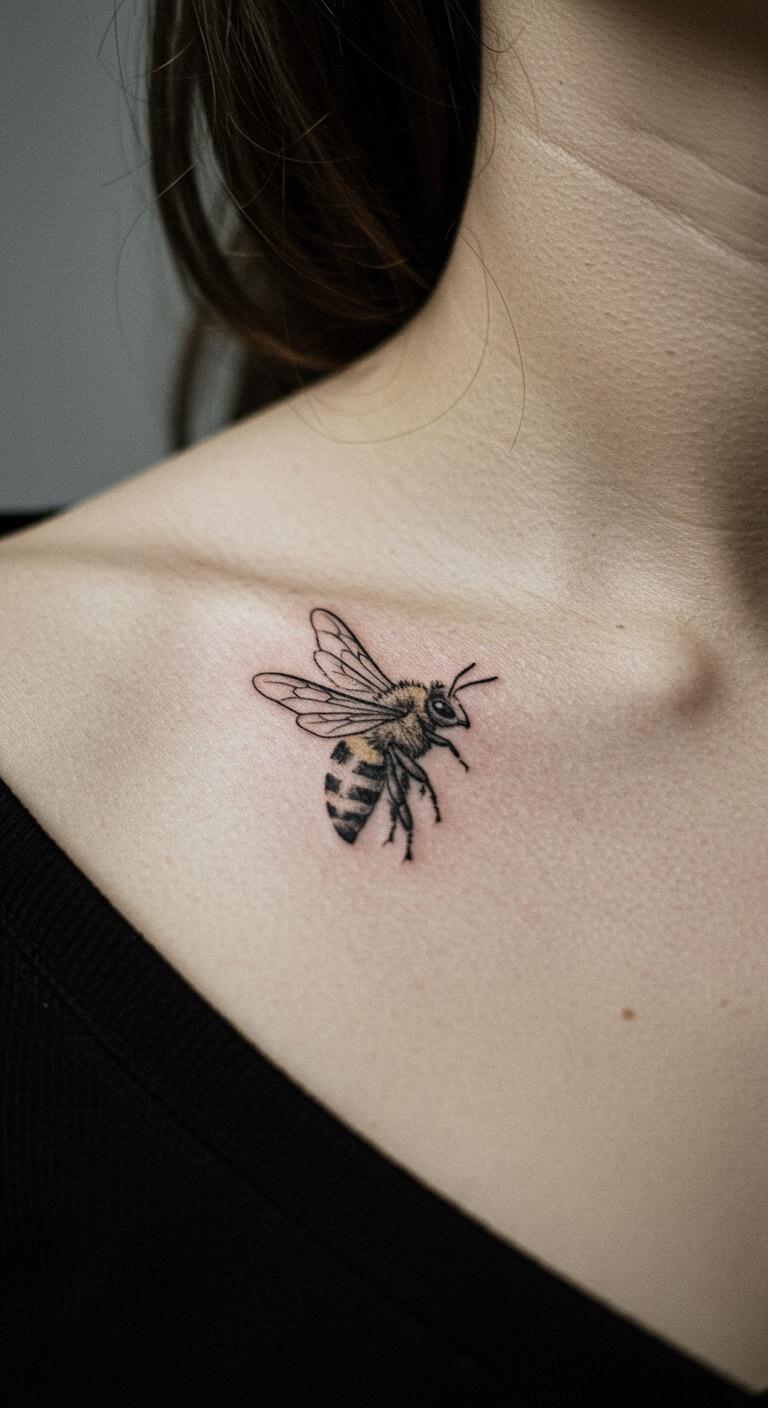
Show the bee in mid-flight. Wings spread out gracefully. Ideal for collarbone flow. Adds movement. Budget options at $35. DIY: Pose drawings on your phone. Easy prep. Gentle washing helps. Stand for productivity. Angle the wings.
Dotwork Bee Texture
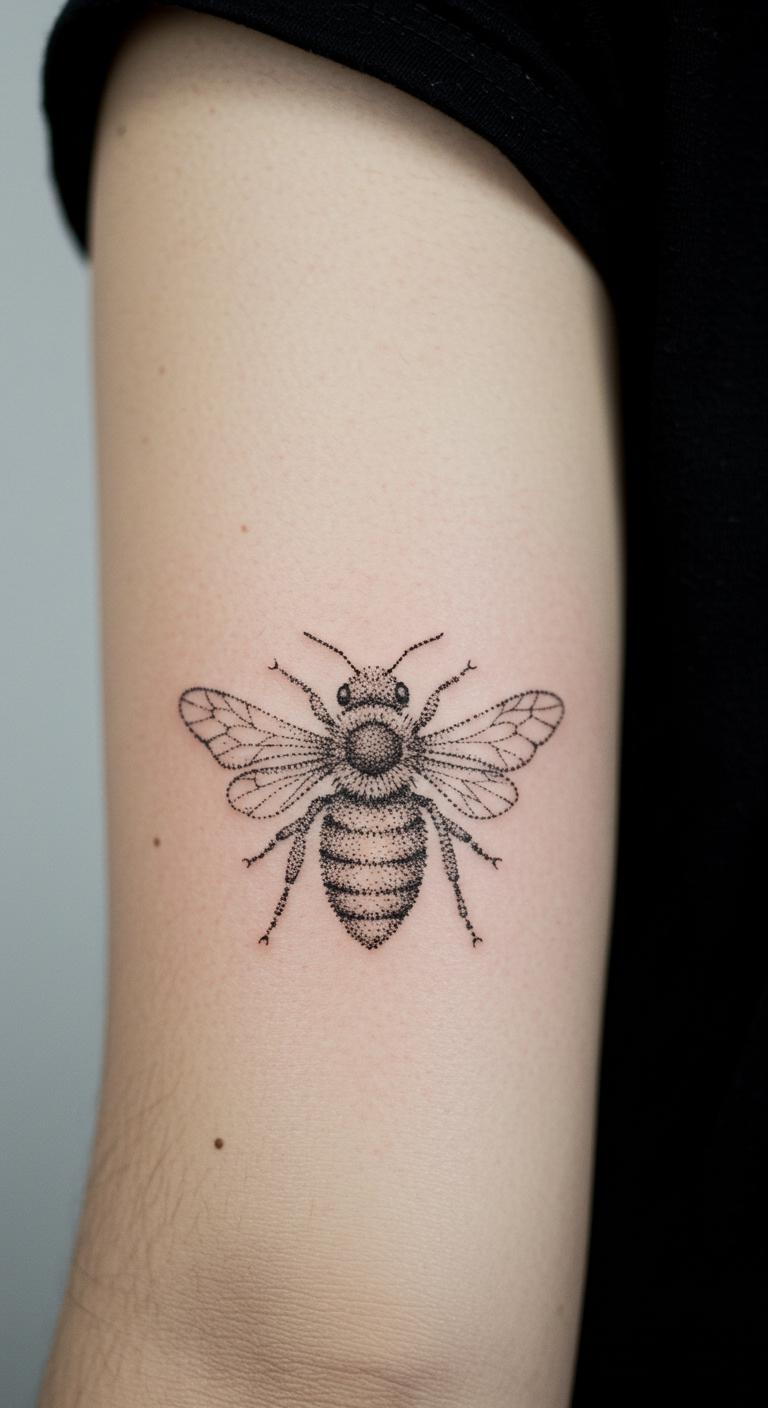
Use dots to build the bee’s form. It gives a textured feel. Place on forearm for display. Unique and tactile. Find for $45. DIY: Dot with a marker grid. Simple start. Avoid picking at it. Highlight nature. Add more dots.
Bee and Leaf Pair
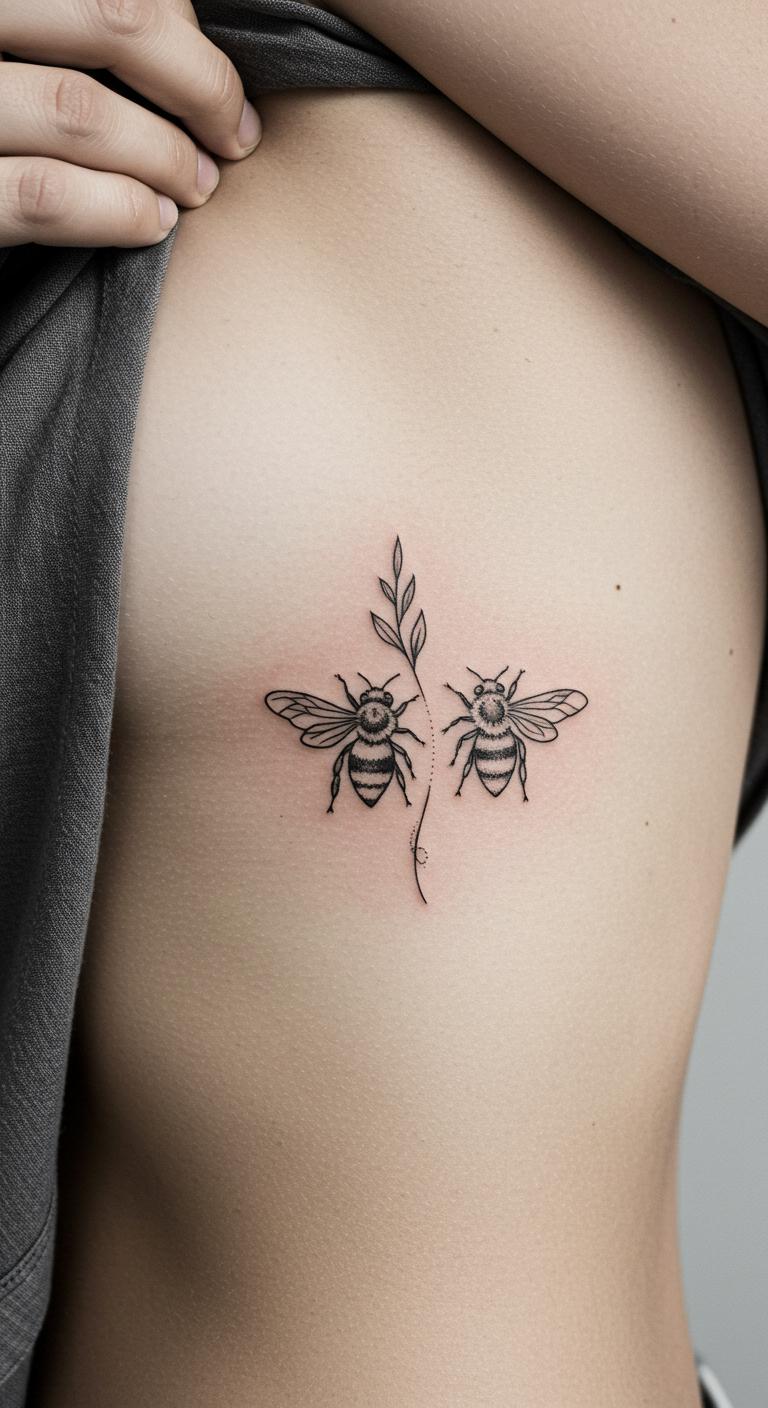
Add a leaf next to the bee. It reinforces the natural theme. Try side rib for art. This is harmonious. Costs around $50. DIY: Leaf stamps for temporary art. Crafty. Use lotion regularly. Embody ecological vibes. Match leaf shapes.
Surreal Bee Wings
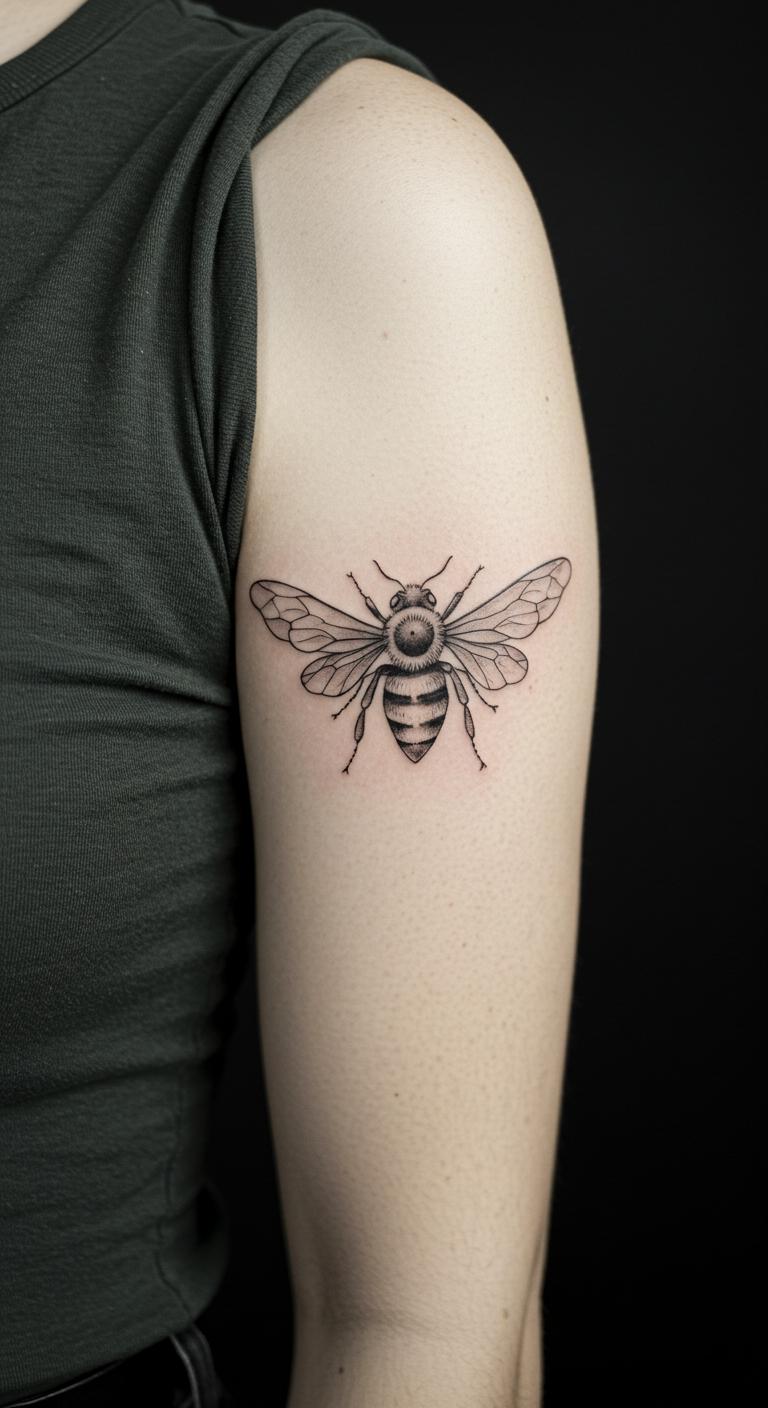
Give the bee imaginative wings. Like feathers or patterns. Put on upper arm for statement. Creative twist. Sessions under $55. DIY: Sketch fantasy ideas on paper. Inspiring. Keep covered initially. Symbolize dreams. Design your wings.
Paired Bee Design
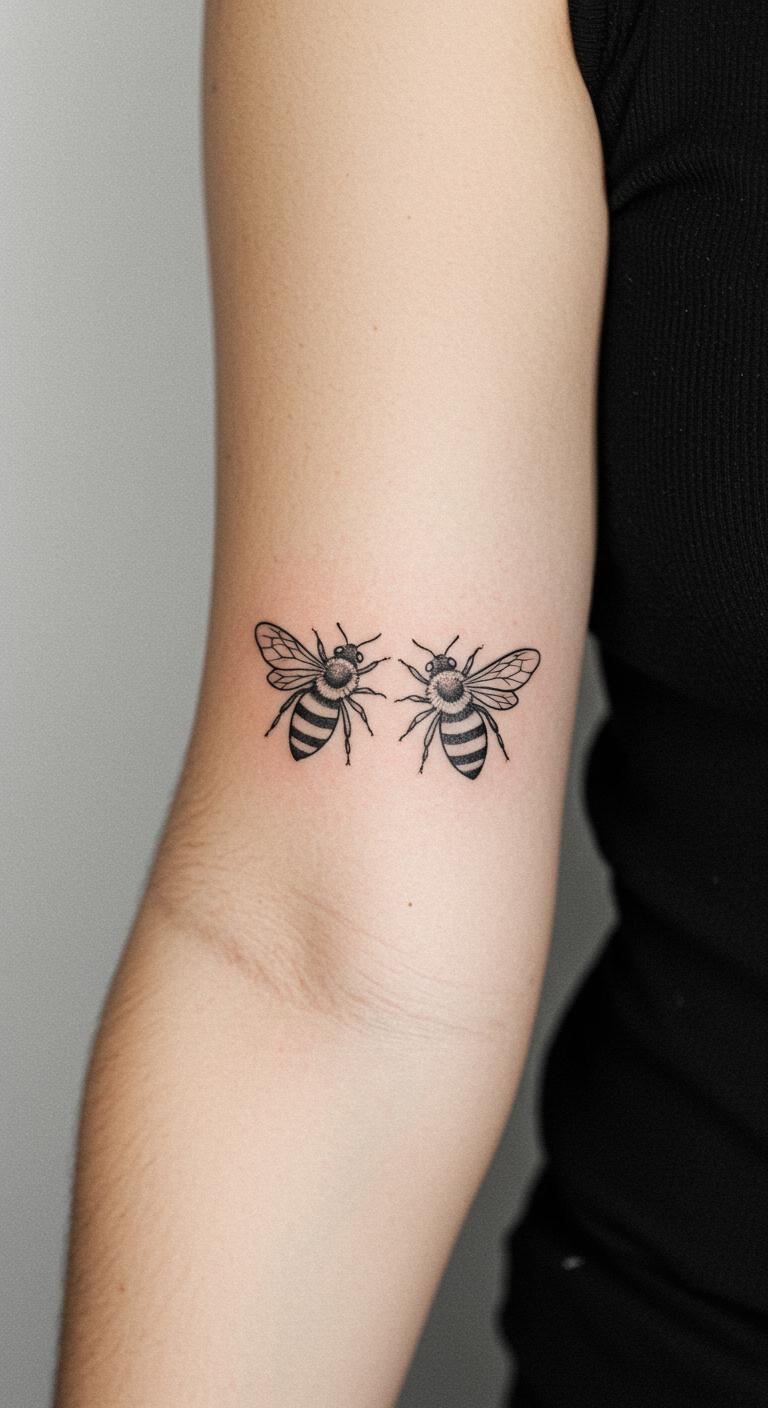
Two bees facing for couples or friends. It shows connection. Place on inner arm. Meaningful and shared. Budget at $40 each. DIY: Draw pairs on friends. Bonding. Maintain symmetry. Represent loyalty. Mirror the bees.
Nape Hidden Bee
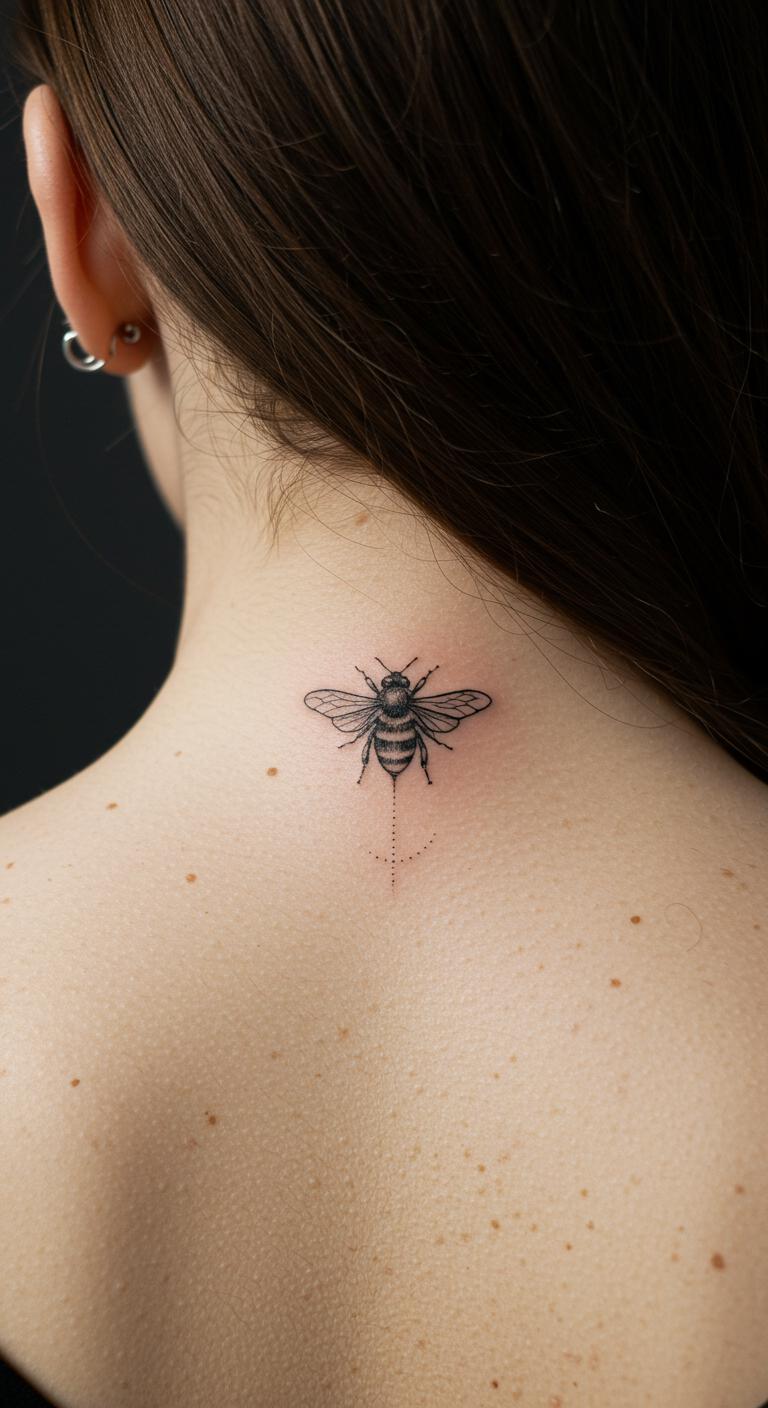
Tuck it at the nape for privacy. Fine lines keep it secret. Perfect for subtle folks. Position at nape. Deals for $30. DIY: Neck stickers to test. Practical. Sun protection matters. Embody quiet strength. Size for comfort.
Inner Forearm Bee
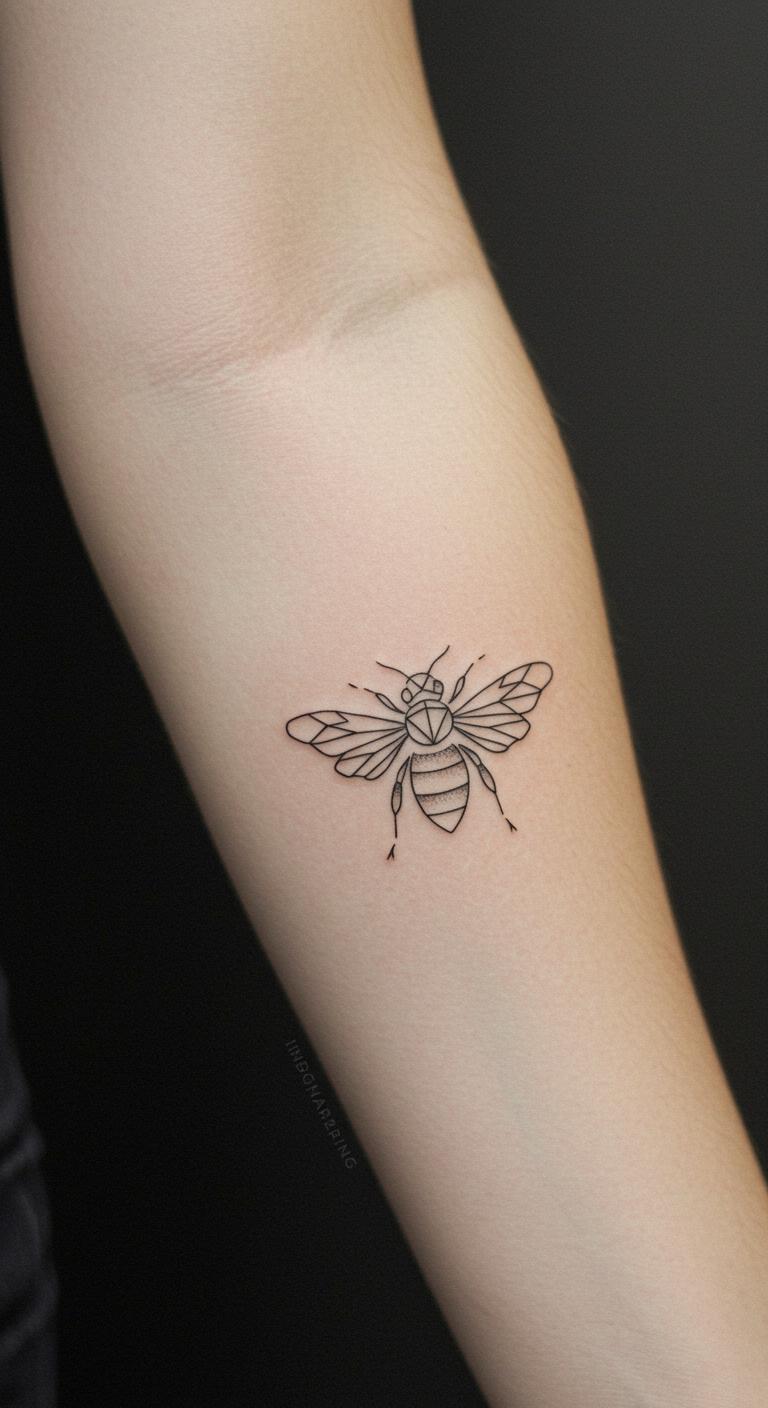
Straight lines on inner forearm. Easy to see and show. Great for reminders. Place on forearm. Cost around $35. DIY: Forearm bands as previews. Useful. Daily care is key. Highlight hard work. Personalize the lines.
Minimalist bee tattoos offer endless ways to express yourself with style and meaning. From simple lines to creative twists, these 27 ideas show how a small design can make a big impact. Pick one that speaks to you, find a trusted artist, and take the step toward a personal symbol. Start sketching today—your perfect tattoo awaits.